

Send email from your own domain
Verify a subdomain once and every quote, invoice, receipt and follow-up goes out from quotes@your-domain instead of FieldQuo's shared address — and where replies land.
Dieser Artikel ist vorerst auf Englisch, Französisch und Spanisch verfügbar. Sie lesen die englische Fassung. Français · Español
Until you connect a domain, the emails your clients receive are sent from FieldQuo's shared address under your company name. That works, but a client's mail app may show “via fieldquo.com” next to your name. Settings → Email Domain lets you prove you own a domain by adding a few DNS records; from then on every client email goes out from an address on it, and nothing on the envelope says FieldQuo.
Nothing here creates a mailbox. The sender address does not need to exist as an inbox — verifying the domain is what grants permission to send as it. Replies are handled separately, by your company email.
Overview
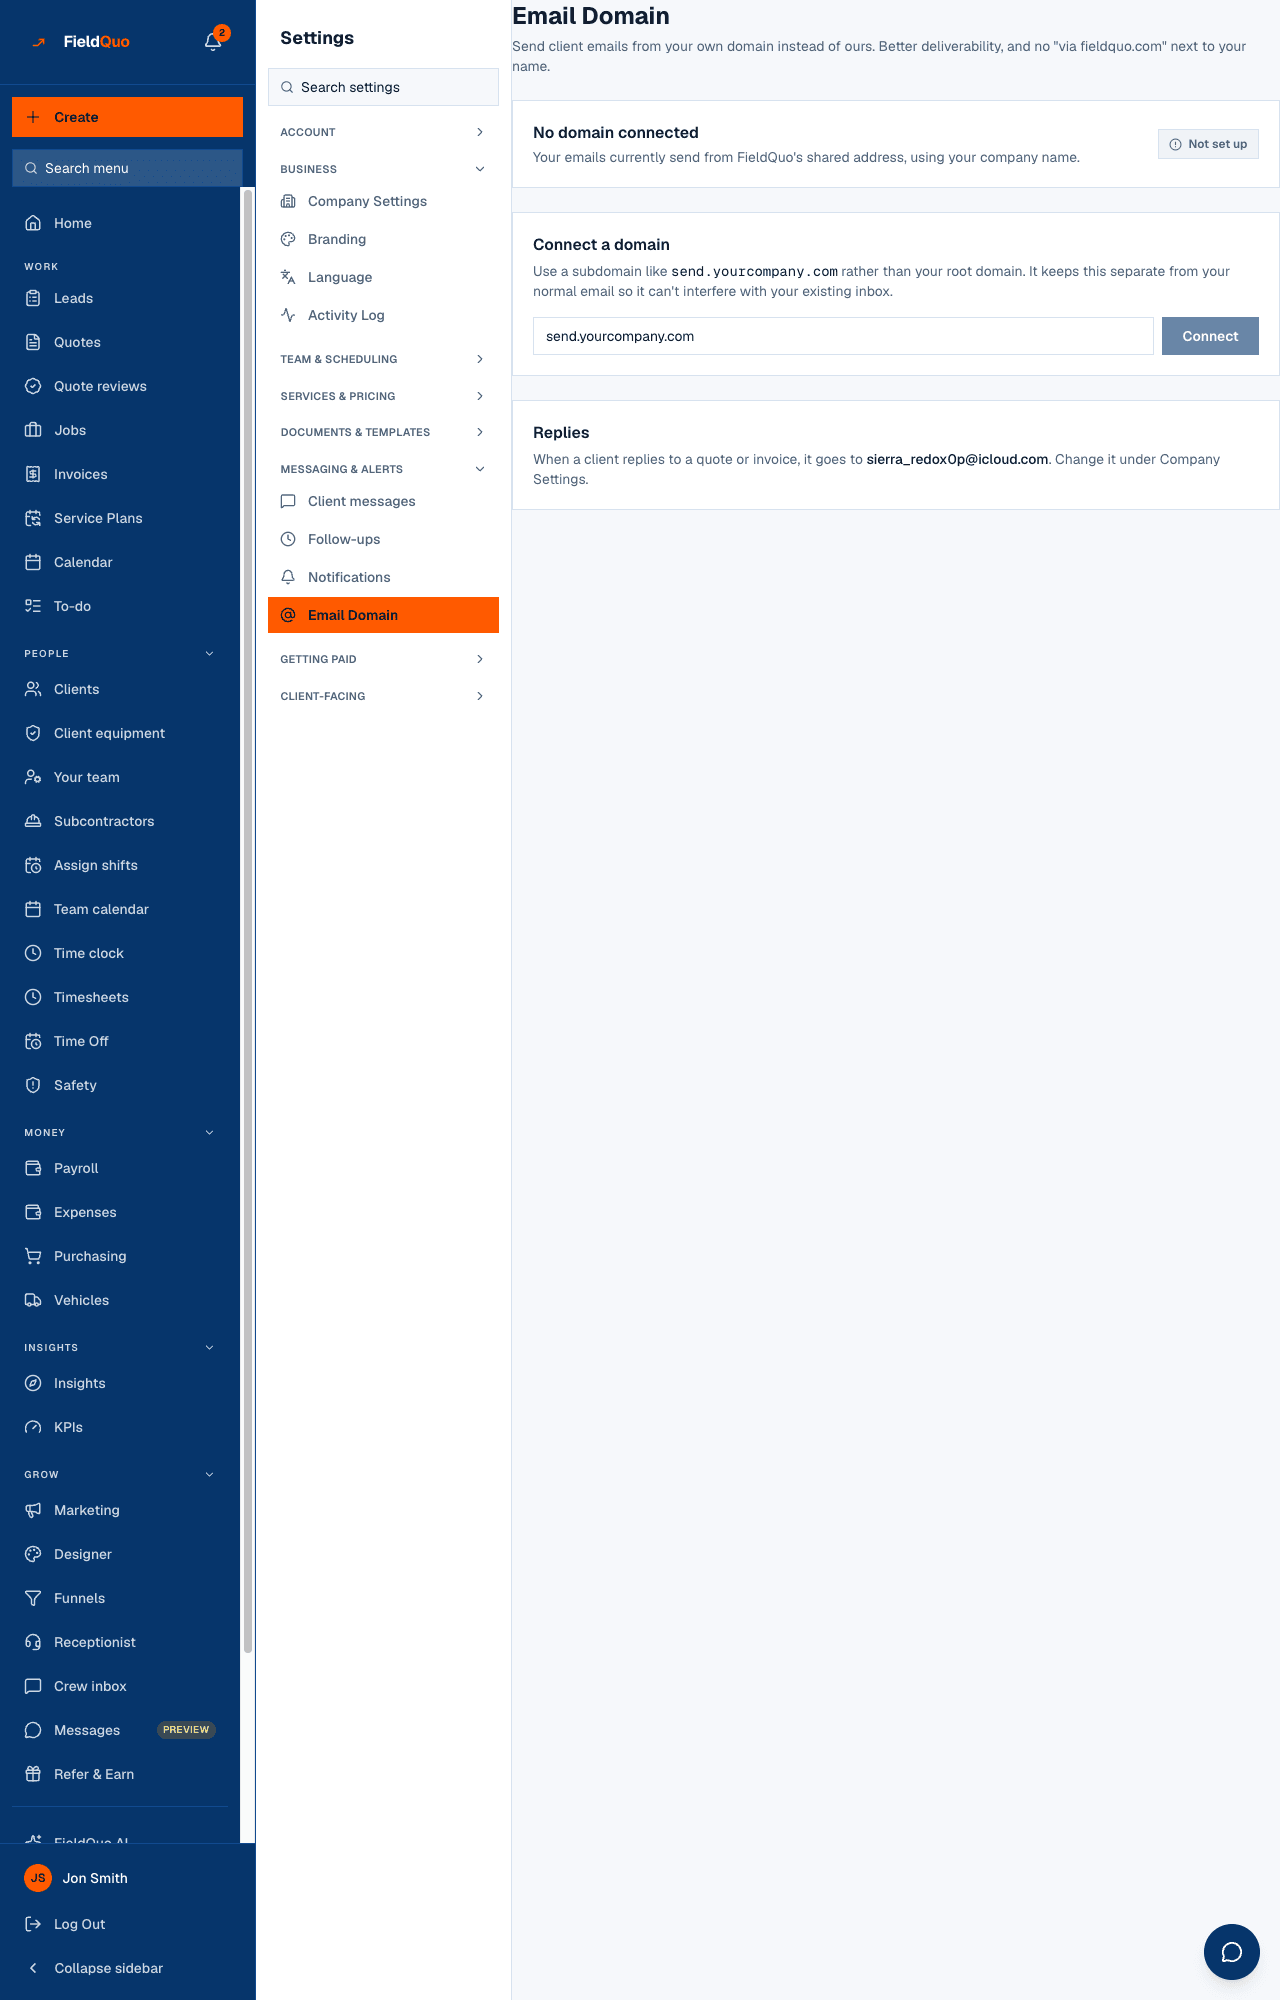
The screen is titled Email Domain — “Send client emails from your own domain instead of ours. Better deliverability, and no ‘via fieldquo.com’ next to your name.” It registers the domain with FieldQuo's email provider, shows you the DNS records to add at your registrar, and rechecks verification on its own every 30 seconds. Once the status reads Verified, every send path in the product — quotes, invoices, receipts, follow-up rules, review requests, marketing campaigns — uses the new address without any further setting.
Use a subdomain such as send.yourcompany.com rather than your root domain. It keeps this separate from your normal email so it cannot interfere with the inbox you already have.
What is on the screen
- The current state: No domain connected with “Your emails currently send from FieldQuo's shared address, using your company name.” — or the domain with its status pill (Verified, Waiting on DNS, Verification failed, Not set up), Check verification and Disconnect.
- Connect a domain — a box for the subdomain and a Connect button.
- Add these DNS records — a table of Type, Name, Value (and Priority and TTL where they apply), each with Copy value, plus five numbered instructions on where to put them.
- Sender address — the local part of the address clients see (the default is quotes), with “Emails will send from quotes@send.yourcompany.com” under it and Save.
- Replies — one sentence saying where a client's reply to a quote or invoice goes.
How to connect a domain
- Open Settings → Email Domain, type a subdomain such as send.yourcompany.com under Connect a domain, and press Connect.
- Sign in wherever you bought the domain — GoDaddy, Namecheap, Cloudflare, Google Domains. That is your DNS host; if you are not sure, it is usually whoever bills you yearly for the domain name.
- Find DNS, DNS records or Manage DNS, and add one new record for each block on the screen, matching Type, Name and Value exactly. Use Copy value — the TXT values are long.
- Save at the host, then leave it. Most hosts apply changes within an hour; some take up to 24. The page rechecks every 30 seconds on its own, and Check verification asks right now.
- When the pill reads Verified, set the Sender address if you want something other than quotes (invoices, hello, office) and press Save.
- Send yourself a quote and look at the From line: your company name, your address, no “via”.
Watch the Name field. Most hosts add your domain automatically: if the Name shown is send._domainkey.example.com you usually enter only send._domainkey. Ending up with send._domainkey.example.com.example.com is the most common mistake, and it shows as Waiting on DNS for ever.
What each status and control means
| On the screen | What it means |
|---|---|
| Verified | Your client emails are sent from the sender address on your domain, in your company's name. Nothing else needs turning on. |
| Waiting on DNS / Verification failed | Nothing sends from your domain yet; emails keep going out from FieldQuo's shared address under your name. Re-check the records — usually the Name field — and wait for the host to apply them. |
| Sender address | Only the part before the @. It changes what clients see in the From line and nothing else; it does not have to be a real mailbox. |
| Disconnect | Your emails go back to sending from FieldQuo's shared address under your company name. The screen asks you to confirm first. |
Where replies go
When a client replies to a quote or an invoice, the reply goes to your company email from Company Settings. If no company email is set, it goes to your account owner's login email instead — so a client's answer is never lost in a mailbox nobody reads. The Replies line on this screen tells you which of the two is in force.
Set the company email to the inbox your office actually watches. The sender address on your domain is never the reply address — it need not exist — so a reply that reached it would evaporate.
Who can see it
The owner, administrators and anyone at the Dispatcher or Manager level can open Settings → Email Domain and connect, verify or disconnect a domain. Crew and Estimator logins do not see the row.
Häufige Fragen
Do I need to create quotes@send.mycompany.com as a mailbox?
No. Verifying the domain is what lets FieldQuo send as that address. Replies go to your company email, not to the sender address.
It has said Waiting on DNS for a day. What now?
Open the records at your DNS host and compare Type, Name and Value with the screen character by character. Nine times out of ten the host doubled your domain in the Name field. Fix it, save, and the page picks the change up on its next 30-second check.
Is anything else different once the domain is verified?
Only the From line. The content, the branding, the language and the timing of every email stay exactly as they were.
War das hilfreich?