

Email Domain
Send quotes, invoices and every other client email from your own domain instead of FieldQuo's shared address — the DNS records, the statuses, the sender address and where replies go.
ਇਹ ਲੇਖ ਫ਼ਿਲਹਾਲ ਅੰਗਰੇਜ਼ੀ, ਫ਼ਰਾਂਸੀਸੀ ਅਤੇ ਸਪੈਨਿਸ਼ ਵਿੱਚ ਉਪਲਬਧ ਹੈ। ਤੁਸੀਂ ਅੰਗਰੇਜ਼ੀ ਸੰਸਕਰਣ ਪੜ੍ਹ ਰਹੇ ਹੋ। Français · Español
Settings → Email Domain is the white-label promise made literal for email. Until you set it up, client emails go out from FieldQuo's shared address under your company name. Once your domain is verified, the From line reads quotes@send.yourcompany.com — your name, your domain, no “via fieldquo.com” beside it — and deliverability improves because the mail is signed as yours.
Nothing here creates a mailbox. Verifying the domain is what grants permission to send as it; the address never needs to exist as an inbox. Replies are handled separately, by the company email set under Company Settings.
Overview
You connect a subdomain — send.yourcompany.com rather than yourcompany.com — so that this sending stays separate from your everyday email and cannot interfere with your existing inbox. FieldQuo registers it with its email provider, shows you the DNS records to add, and rechecks on its own every 30 seconds while the status is pending.
Every email FieldQuo sends on your behalf uses the verified domain: quotes, invoices and receipts, follow-up rules, review requests, service-plan invoices, marketing campaigns. Disconnecting sends everything back to the shared address; nothing already sent changes.
What is on the screen
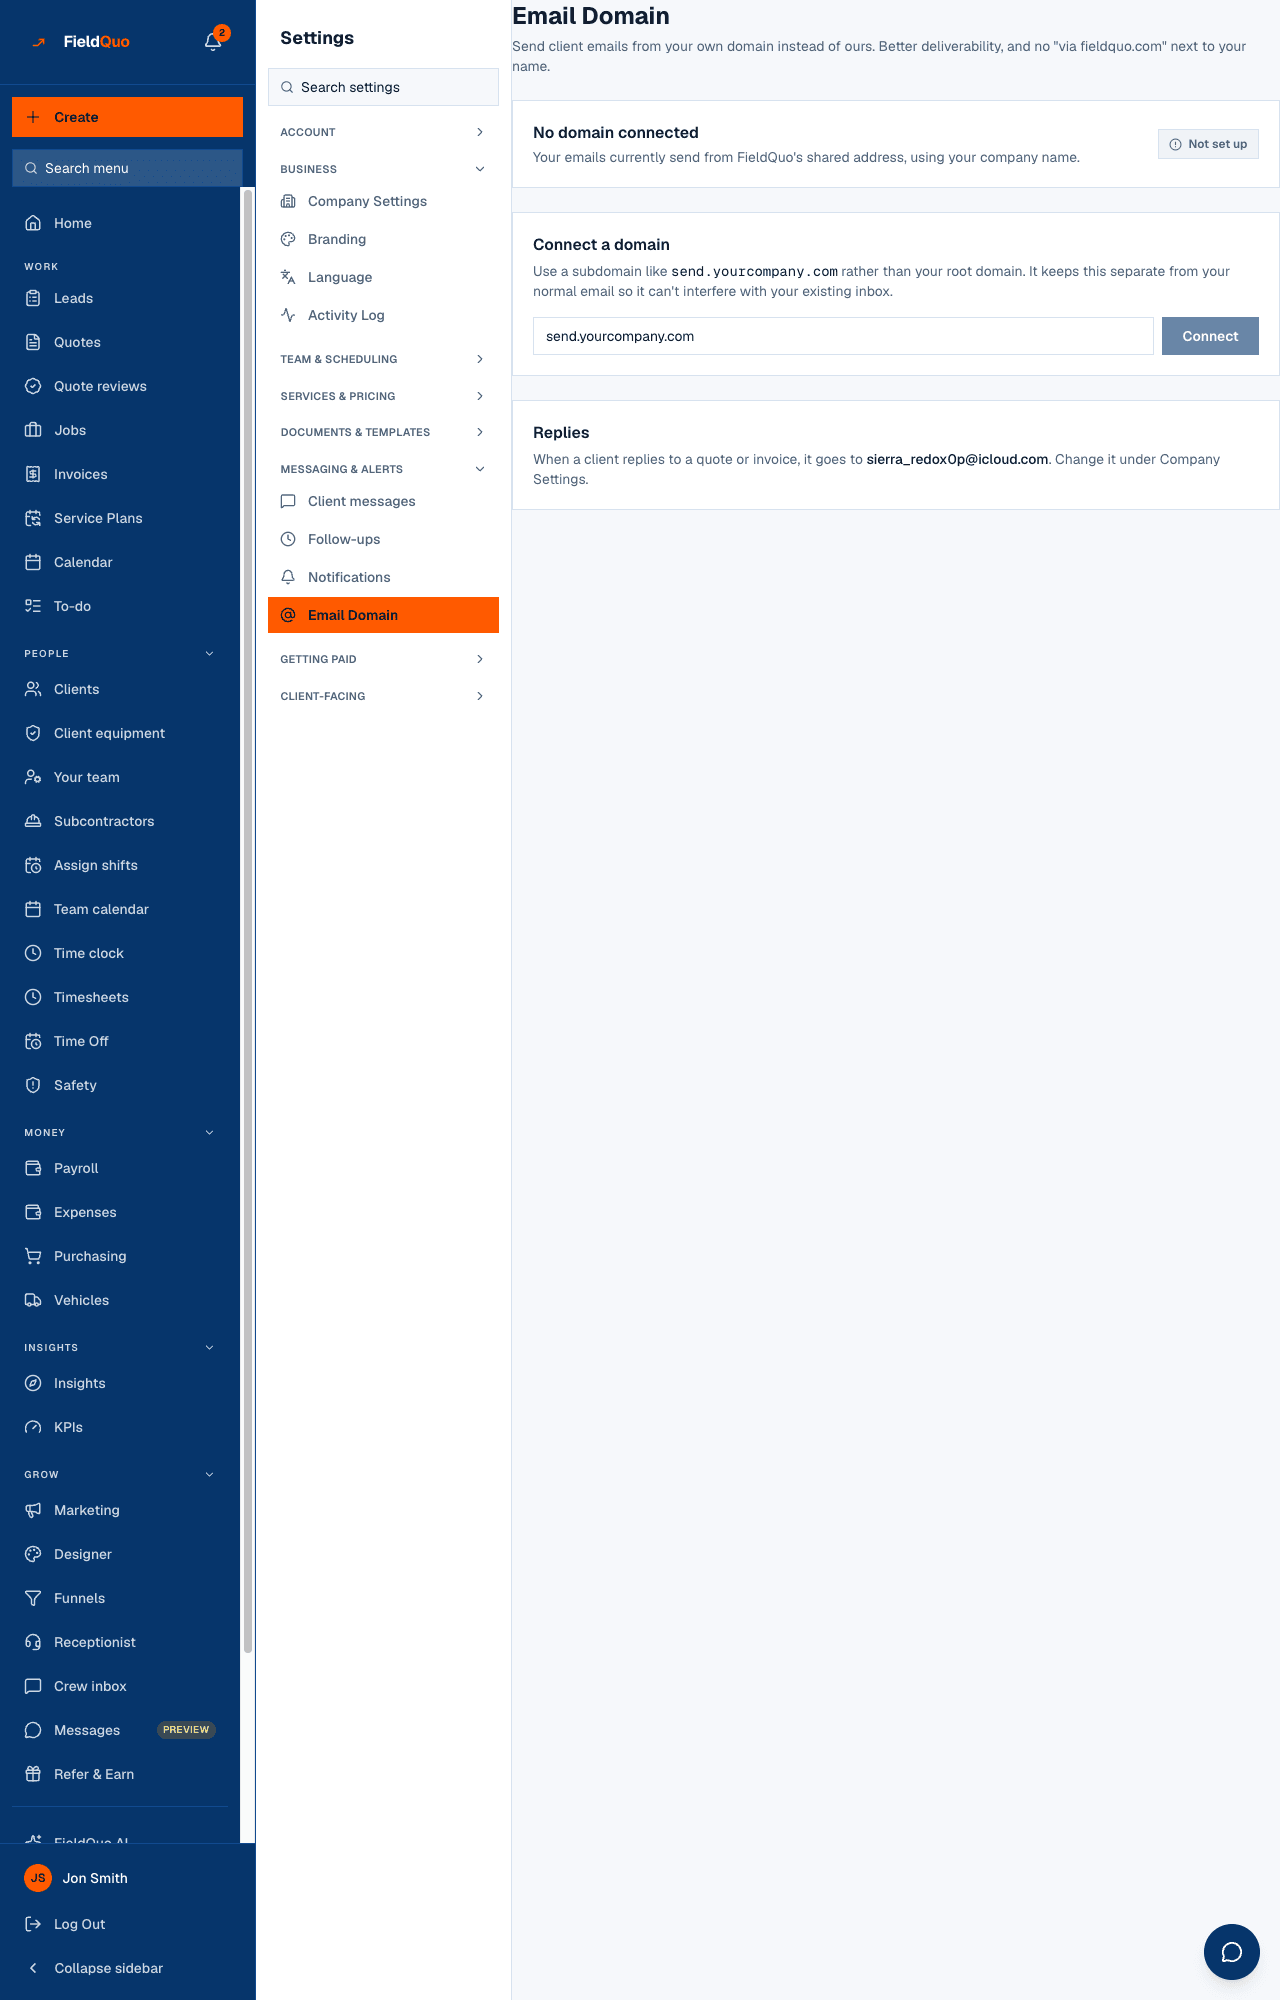
- The status card — your domain (or No domain connected), the sentence Emails will send from … or Your emails currently send from FieldQuo's shared address, using your company name., and a status badge. Once connected: Check verification (until verified) and Disconnect.
- Connect a domain — shown only before you connect: one box and the Connect button.
- Add these DNS records — shown while verification is pending or failed: the five-step walk-through and each record with its Type, Name, Value, Priority and TTL, each value with a copy button.
- Sender address — shown once connected: the part before the @ (default quotes) and Save.
- Replies — where a client's reply to a quote or invoice goes: your company email, or your account owner's email, because no company email is set.
How to connect your domain
- Open Settings → Email Domain.
- Under Connect a domain, type a subdomain such as send.yourcompany.com and press Connect. The status becomes Waiting on DNS and the records appear.
- Sign in wherever you bought the domain — GoDaddy, Namecheap, Cloudflare, Google Domains. That is your DNS host. Find DNS, DNS records or Manage DNS.
- Add a new record for each block on the screen, matching Type, Name and Value exactly. Watch the Name field: most hosts add your domain automatically, so for send._domainkey.example.com you usually enter only send._domainkey. Paste values with no quotes and no line breaks.
- Save at your host and leave it. Most hosts apply changes within an hour, some take up to 24. This page rechecks every 30 seconds on its own; Check verification asks right now.
- When the badge reads Verified, set the Sender address if you want something other than quotes@, and press Save.
Ending up with send._domainkey.example.com.example.com in the Name field is the most common mistake. If your host shows the full name after saving, you did it right.
The four statuses
| Badge | Meaning | What sends from your domain |
|---|---|---|
| Not set up | No domain connected. | Nothing — the shared address is used. |
| Waiting on DNS | The domain is registered; the records have not been seen yet. | Nothing yet. The page keeps checking. |
| Verification failed | The provider looked and the records were wrong or missing. | Nothing. Fix the records and press Check verification. |
| Verified | The records are in place. | Every client email, from now on. |
Sender address and replies
Sender address is the address clients see. It does not need to be a real mailbox — quotes@, hello@, office@ all work — because verifying the domain is what lets FieldQuo send as it. Change it and every email from then on carries the new one.
Replies are a different thing. When a client replies to a quote or invoice, the reply goes to your company email; with none set it falls back to the account owner's email so a reply is never silently lost. Change it under Company Settings — this screen only shows it, and prompts you for one on arrival if it is missing.
FieldQuo's own domain and its subdomains are refused here. A tenant cannot verify send.fieldquo.com and send as FieldQuo; use your company's domain.
Who can see it
Owners, administrators, and the Dispatcher and Manager levels — the same people who can manage the team. Connecting, changing the sender and disconnecting all need that access; the read is also allowed to a read-only support session, because “our quotes aren't arriving” usually ends here.
ਅਕਸਰ ਪੁੱਛੇ ਜਾਂਦੇ ਸਵਾਲ
Do I need to create quotes@send.mycompany.com as a mailbox?
No. The address only has to exist as a sender, and verifying the domain is what allows that. Replies go to your company email regardless.
Can I use my root domain instead of a subdomain?
The screen asks for a subdomain, and for a reason: it keeps FieldQuo's sending records separate from the ones your normal email relies on.
What happens to my emails if I disconnect?
They go back to FieldQuo's shared address under your company name immediately. Nothing already sent is affected, and you can connect again later.
ਕੀ ਇਹ ਮਦਦਗਾਰ ਸੀ?